Zigbee2MQTT on Kubernetes
Apr 5, 2021
Warning: This post was written 1913 days ago, and may contain incorrect information, outdated opinions, and incorrect language due to my age at the time. Opinions in this post are not representative of who I am as a person today.
For some time, I’ve been using a Zig-a-zig-ah and Zigbee2MQTT on a spare Raspberry Pi 2. It was far from the most stable platform as the zzh sucked power and caused voltage issues with the Pi, but it worked for what I needed. After a few months, I was frustrated at the frequent restarts the system required. The voltage drops should cause just enough of an issue for Z2M to stop communicating with the zzh and break all of my home automation. I needed a stable platform, which I decided to over-engineer.
I started using Kubernetes about a year ago when I needed to learn the platform for some upcoming projects in my day job. As a good test ground, I moved the vast majority of my home workloads over to a small one master and three worker cluster, excluding the apparent issues of persistent storage and ingress. It was relatively easy and is now in a state where it’s stable to use for more critical items. To ease configuration, I make use of Flux v2 to manage Helm deployments and other objects using a single Github repository.
The Hardware
The node I’m going to be using to host the adapter is a relatively low-powered system, a Optiplex 160, its an SFF (small form factor) Atom-based PC. One problem is that the system itself isn’t powerful enough to run Zigbee2MQTT. Thankfully, Z2M supports remote devices over TCP sockets, so I’ll be able to keep a small pod to act as a gateway to the device on the hardware and use the fast VM nodes to run Z2M itself.
First of all, we needed a consistent device name for the adapter. This step isn’t critical, as you could use the full device path, but by giving it a consistent name (as defined by udev) it makes the configuration a little more user-friendly. On the node I created /etc/udev/rules.d/zigbee-controller.rules with the following:
# CC2531
KERNEL=="ttyACM*", ATTRS{idVendor}=="0451", ATTRS{idProduct}=="16a8", MODE="0666", SYMLINK+="zigbee1"
# Zig-a-zig-ah
KERNEL=="ttyUSB*", ATTRS{idVendor}=="1a86", ATTRS{idProduct}=="7523", MODE="0666", SYMLINK+="zigbee2"
I have two controllers of a different type, so I created rules to export them as zigbee1 and zigbee2. A quick reboot and these devices now appear as their correct names:
% ls -1 /dev/zigbee*
/dev/zigbee1
/dev/zigbee2
I am going to be making use of the ser2sock Helm chart from K8s-at-home, this deploys a small application to proxy the serial port to a TCP socket, which Zigbee2MQTT can use. But before I could deploy it, I needed to make sure that the pod can find the hardware and be assigned to the same node every time.
By default with Kubernetes, your application will be scheduled on any worker node that is operational and not cordoned off. This presents a problem when dealing with physical hardware, it is only available on a select node, and you need to ensure that the application is ran on that particular node. Kubernetes supports the concept of labelling, where a node can be tagged with a text string, and a Pod definition can require a set of labels that it expects for the node it’ll be running on. Using kubectl its a quick change to the node:
% kubectl label node k8s-node04 doofnet.uk/device=zigbee-controller
% kubectl get node k8s-node04 --show-labels
NAME         STATUS                     ROLES    AGE   VERSION   LABELS
k8s-node04   Ready,SchedulingDisabled   <none>   40d   v1.20.4   doofnet.uk/device=zigbee-controller
So now I have the elements I need to write a Helm release. The device will be linked as /dev/zigbee2 and available on a node labelled with doofnet.uk/device=zigbee-controller. So I create a HelmRelease object to deploy ser2sock:
---
apiVersion: helm.toolkit.fluxcd.io/v2beta1
kind: HelmRelease
metadata:
  name: zigbee2
  namespace: ha
spec:
  interval: 5m
  chart:
    spec:
      chart: ser2sock
      version: "2.0.3"
      sourceRef:
        kind: HelmRepository
        name: k8s-at-home
        namespace: flux-system
      interval: 1m
  values:
    device: /dev/zigbee2
    tolerations:
      - effect: NoSchedule
        operator: Exists
      - key: CriticalAddonsOnly
        operator: Exists
      - effect: NoExecute
        operator: Exists
    affinity:
      nodeAffinity:
        requiredDuringSchedulingIgnoredDuringExecution:
          nodeSelectorTerms:
            - matchExpressions:
                - key: doofnet.uk/device
                  operator: In
                  values:
                    - zigbee-controller
Another option I’ve put in the release is the list of tolerations. My physical node is very underpowered and I don’t want any other workloads on it, so I marked the node as ScheduleDisable. By adding the tolerations I can have this pod ignore the restrictions and still run on the node.
Once pushed to Flux and deployed by Helm you’ll see a new pod appear called zigbee2-ser2sock, and if you check the logs you’ll be able to see if it found the hardware and started correctly:
ser2sock Serial 2 Socket Relay version V1.5.5 starting
ser2sock Listening socket created on port 10000
ser2sock Start wait loop using ser2sock communication mode
ser2sock Opened com port at /dev/ttyUSB0
ser2sock Setting speed 115200
ser2sock Set speed successful
The pod definition, created by the Helm chart, maps the device name you provided (/dev/zigbee2) to /dev/ttyUSB0 for ease of configuration. Initially this confused me and its always worth checking the Chart definitions to ensure what value is being used where.
Zigbee2MQTT
Now that the adapter is available via TCP using ser2sock, I can deploy Zigbee2MQTT. K8s-at-home also has a chart ready to deploy the application, so I make use of it:
---
apiVersion: helm.toolkit.fluxcd.io/v2beta1
kind: HelmRelease
metadata:
  name: zigbee2mqtt-zigbee2
  namespace: ha
spec:
  interval: 5m
  chart:
    spec:
      chart: zigbee2mqtt
      version: "6.2.1"
      sourceRef:
        kind: HelmRepository
        name: k8s-at-home
        namespace: flux-system
      interval: 1m
  values:
    image:
      tag: 1.18.2
    config:
      homeassistant: true
      permit_join: true
      mqtt:
        base_topic: zigbee2
        server: "mqtt://mosquitto.monitoring"
      serial:
        port: "tcp://zigbee2-ser2sock:10000"
      frontend:
        port: 8080
    persistence:
      data:
        enabled: true
        accessMode: ReadWriteOnce
        size: 1Gi
    ingress:
      enabled: true
      hosts:
        - host: zigbee2-dashboard.apps.doofnet.uk
          paths:
            - path: /
              pathType: Prefix
Under the values section, you can see a key of config; any subkey of this value used to create the Zigbee2MQTT configuration YAML file in a special location on the pod, so on the first boot it’ll use these values as the defaults. I defined URL for our ser2sock instance, and also details of our MQTT server and a base topic to use.
Once done, push it to Flux, wait for it to deploy, and check the pod named zigbee2mqtt-zigbee2:
zigbee2mqtt-zigbee2 Using '/data' as data directory
zigbee2mqtt-zigbee2 > zigbee2mqtt@1.18.2 start /app
zigbee2mqtt-zigbee2 > node index.js
zigbee2mqtt-zigbee2 Logging to console only'
zigbee2mqtt-zigbee2 Starting Zigbee2MQTT version 1.18.2 (commit #abd8a09)
zigbee2mqtt-zigbee2 Starting zigbee-herdsman (0.13.88)
zigbee2mqtt-zigbee2 zigbee-herdsman started
zigbee2mqtt-zigbee2 Coordinator firmware version: '{"meta":{"maintrel":1,"majorrel":2,"minorrel":7,"product":1,"revision":20210120,"transportrev":2},"type":"zStack3x0"}'
And I can check the dashboard ingress endpoint I defined in the configuration:
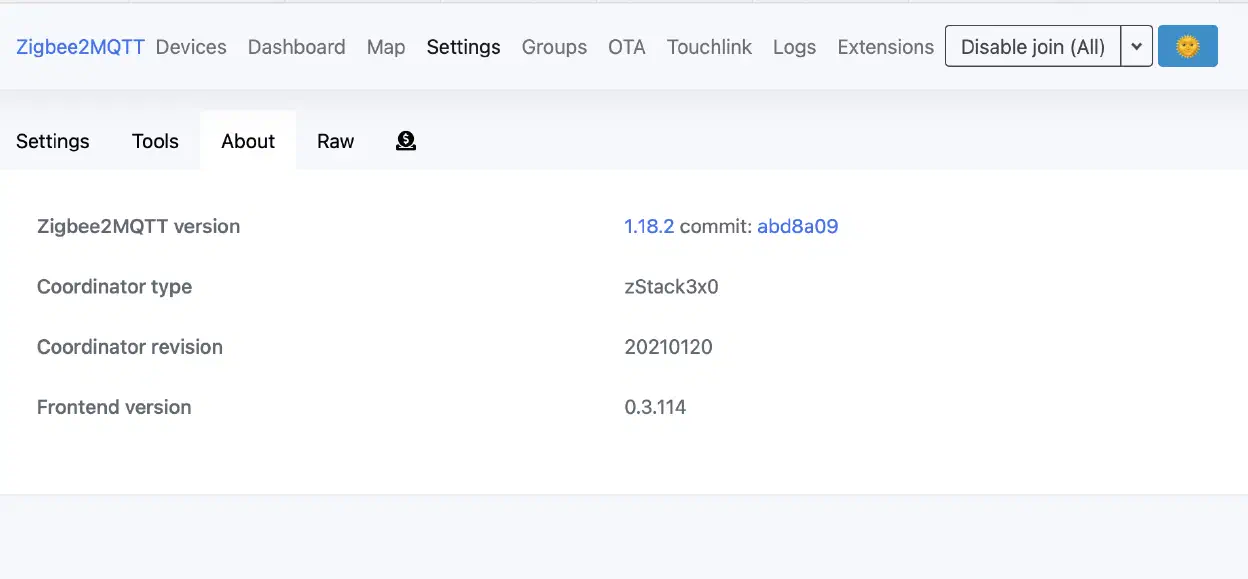
Success! We have a running Zigbee2MQTT in Kubernetes. This solution was built off the back of hard work done by the Zigbee2MQTT team, K8s-at-home, and a few others, but with relatively little work, you can have a hardware-dependent application running quite quickly within Kubernetes.