Fixing a Game Gear - Part 1
Jun 30, 2021
Warning: This post was written 1826 days ago, and may contain incorrect information, outdated opinions, and incorrect language due to my age at the time. Opinions in this post are not representative of who I am as a person today.
I need to re-live my youth through the purchase of expensive old technology.
When I was younger, much, much younger, my prized possession was a Sega Game Gear. At the time it was the pinnacle of gaming technology; a colour backlit screen, a ‘powerful’ processor equal to the Master System. The device went along everywhere with me and I chewed through batteries like there was no tomorrow.
One day, I loaned it to a friend of mine, as he wanted to play through Crystal Warriors, and I never saw it again. Turns out that his father had got addicted to Columns and decided to take the Game Gear on his work trips with him. After a while, I heard that it was mangled in accident, but I never got to see the remains.
In the last few years i’ve been collecting Gameboy consoles, mostly due to my love of Pokemon, and last week I came upon an extremely cheap Game Gear on eBay, just £30. Game Gears have a terrible reputation for quality, the capacitors don’t survive well over the years, and it is well known that if you find a working Game Gear without modifications, then you’ve hit gold. I took my chances and purchased it, with no idea what I was getting into.
Game Gear Capacitor Replacement
First of all, they listed the item as powers on but the screen is “broken”, again, this could be due to many reasons and not something to write off. My first concern was when I opened the box the first thing I saw was Japanese newspaper wrapping the device, and this device had been bought from within the UK. Maybe, they bought it from Japan and then realised that it was either beyond repair, their expertise, or just too expensive to get fixed.
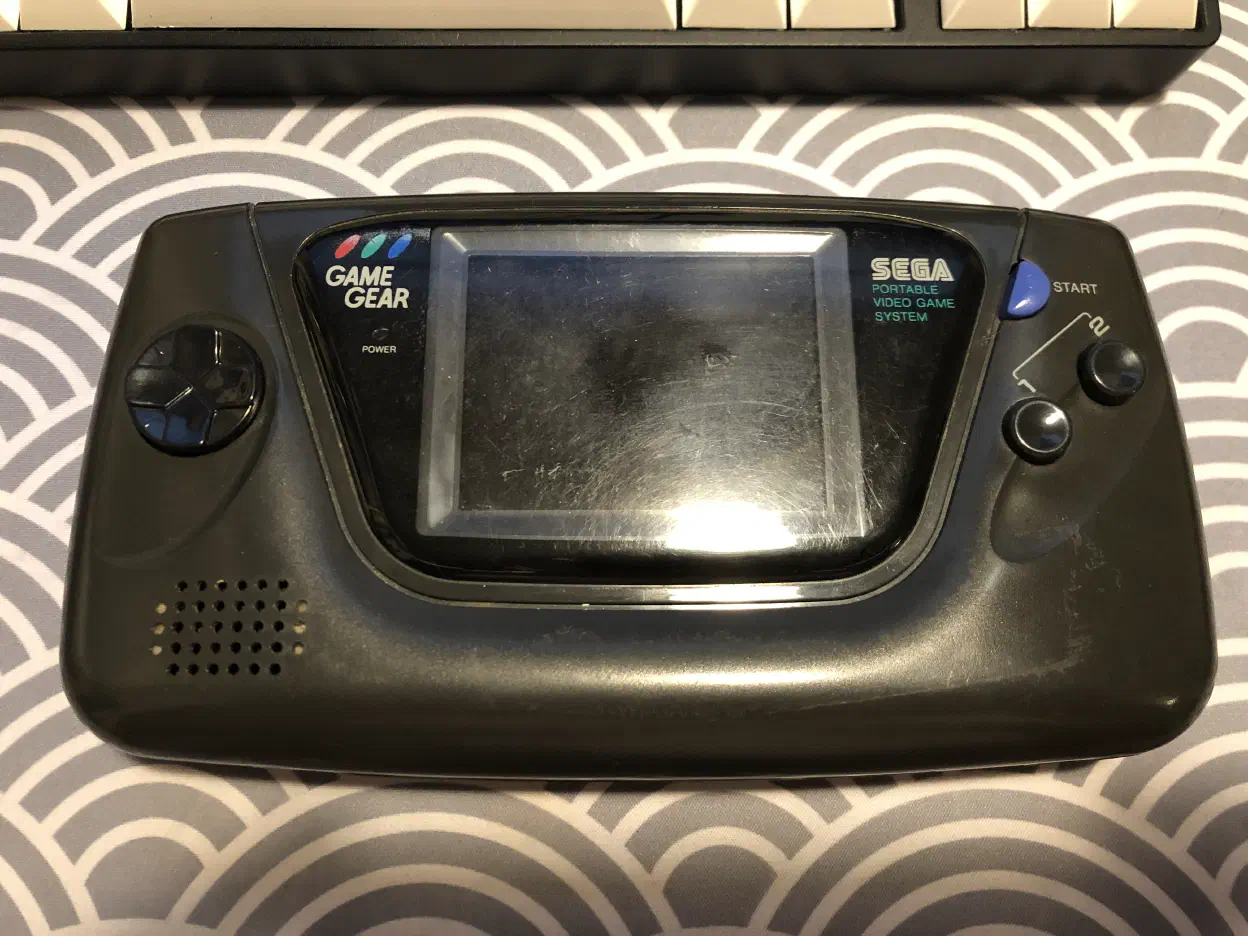
The outside looks OK, its had some heavy use but nothing too drastic. Then I opened the battery compartments:
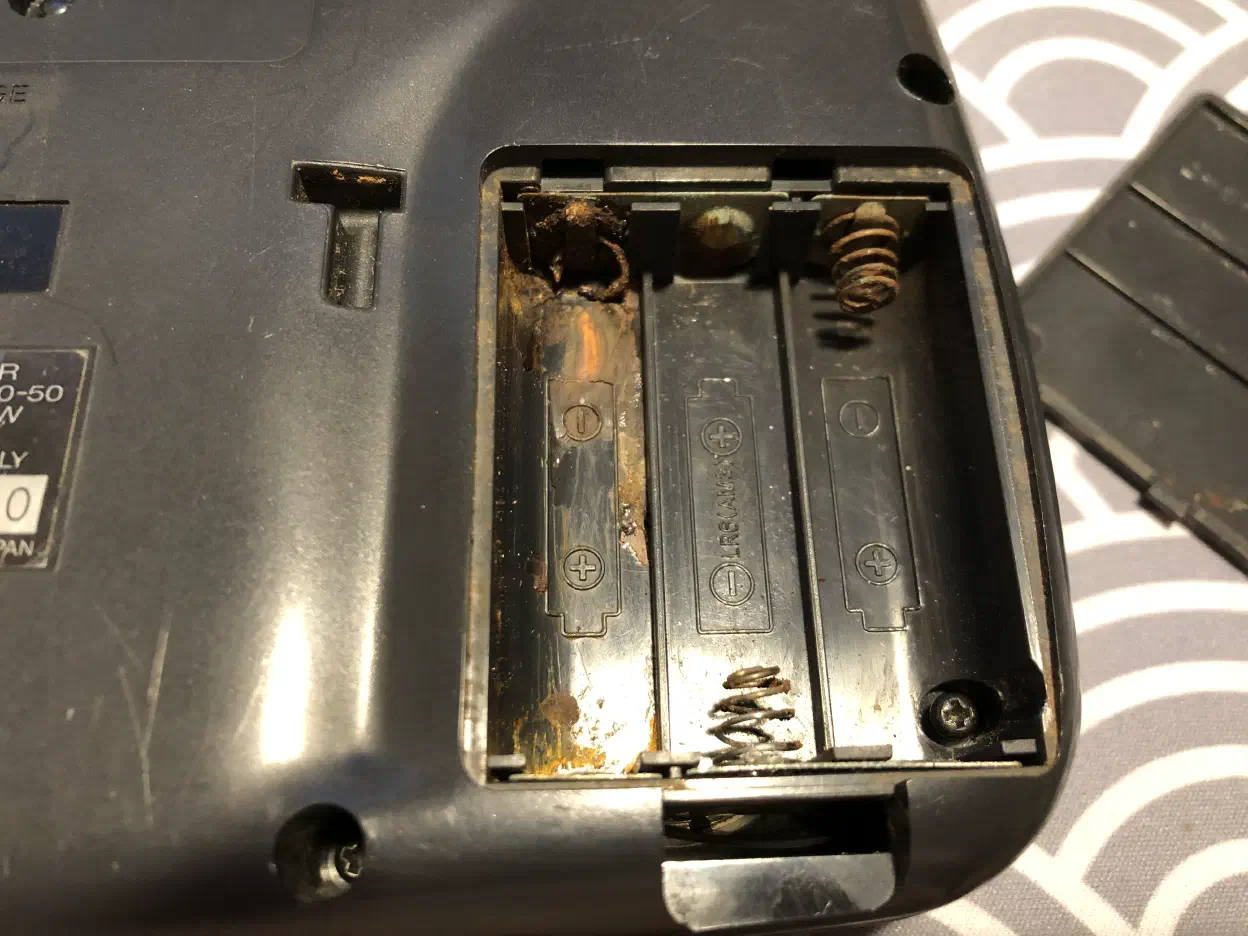
Oh no, that doesn’t look good. Thankfully this was the worst damage in the entire device, it seems that it had been left with some rotting batteries for quite some time and they had rusted away the battery connectors. The Game Gear requires six AA batteries to be ran in series to get the 9v required by the console, so these pads are not the main connectors to the power board, phew.
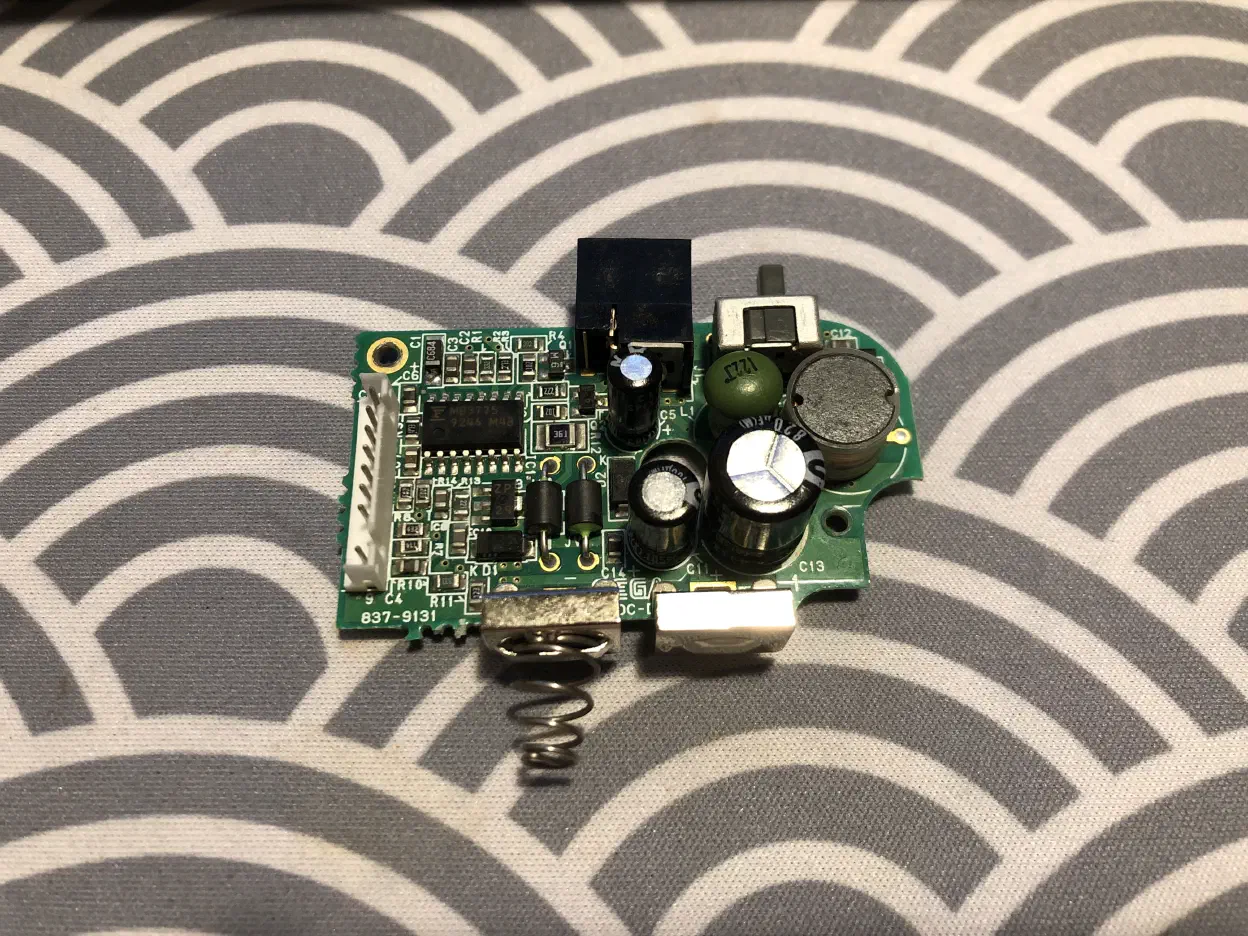
The power board didn’t look bad at all, it had some signs of watermarks but no obvious damage. I don’t intend on keeping this board, rather replacing it with a CleanPower GG which is a drop-in replacement for the board and has a USB-C port for easy connection up to a power bank, rather than lugging a 9v wall wart around or six AA batteries and spares. I ordered mine from RetroSix which is a UK retro console parts supplier in the UK, the delivery took 2 days which is great for a smaller company.
After I received the new power board I wasted no time getting it in the device, the Game Gear’s boards are all connected via simple connectors so it was a quick swap out. Then, it came time to power the device on for the first time.
I flicked the switch, and the backlight switched on, but nothing on the screen. I noticed the power LED hadn’t lit up at all, so after a little bit of poking it sprung into life, the screen was on and the LED, then as quickly as it came on it died again. I suspect it needs new capacitors.
So that is what I’m up to at the moment, i’m currently deciding on spending £50 on a repair service to replace the caps, or £90 on a good soldering iron and to try it myself.